

Cookies help us deliver our services. By using our services, you agree to our use of cookies.
Recently viewed products
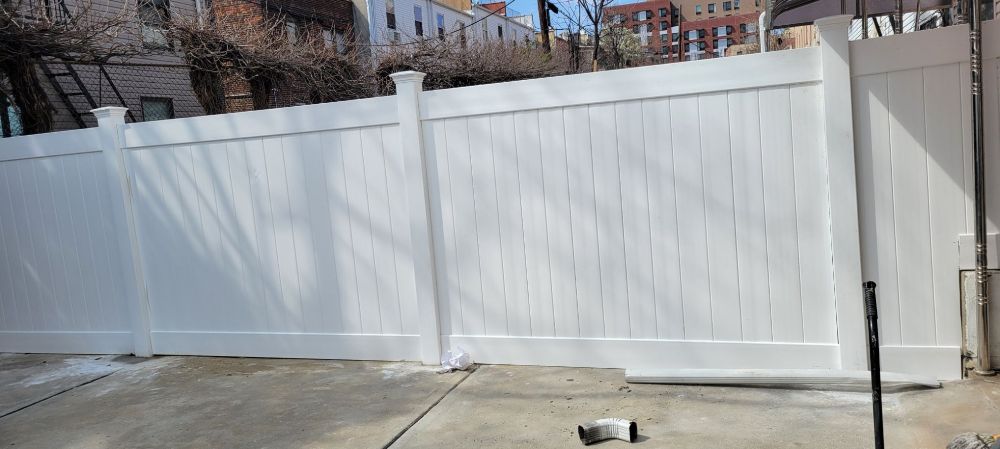
Patio & Fence work
Monday, April 14, 2025
Two day work for the Installation of the fence of 621 & 623 Coster Street. The new fence is very private and clean installation.
Two-Day Work Plan for Installing a Vinyl Fence
A step-by-step guide to ensure a successful fence installation
Installing a vinyl fence can transform the look and functionality of a property by offering durability, aesthetic appeal, and low maintenance. A well-organized plan ensures the installation process runs smoothly and is completed within two days. This guide outlines the steps for a two-day vinyl fence installation.
Preparation Before Starting
Before beginning the installation, it is crucial to prepare adequately:
- Obtain permits: Check local regulations to ensure compliance and acquire any necessary permits.
- Mark boundaries: Determine the fence line and ensure it aligns with property boundaries by consulting a surveyor if needed.
- Locate utilities: Contact the relevant utility companies to mark underground lines to avoid damaging them during post digging.
- Gather tools and materials: Ensure all required tools (e.g., post-hole digger, level, drill) and materials (vinyl panels, posts, concrete mix) are on-site.
- Measure and plan: Accurately measure the area and calculate the number of panels and posts needed for the fence.
Day 1: Setting the Foundation
The first day focuses on preparation and the proper installation of the fence posts, which are crucial for fence stability and alignment.
Step 1: Layout and Marking
Begin by marking the fence line with stakes and strings. Clearly indicate where each post will be placed. Double-check measurements to ensure accuracy and consistent spacing between posts.
Step 2: Digging Post Holes
Using a post-hole digger, create holes along the marked fence line. The holes should be deep enough to accommodate the fence posts and provide stability—typically 1/3 the length of the post or 2 to 3 feet deep. Ensure the diameter of the holes allows for concrete around the posts.
Step 3: Setting Posts
Position the posts in the holes, ensuring they are aligned with the fence line. Use a level to make sure the posts are vertical. Mix the concrete according to the manufacturer's instructions and pour it into the holes around the posts. Let the concrete set and cure overnight to provide a solid base.
Step 4: Clean-Up and Preparation
Once the posts are set, tidy up the work area and prepare materials for the next day's tasks. Check all posts for alignment before ending the day.
Day 2: Installing Fence Panels
The second day is dedicated to attaching the vinyl panels to the posts and completing the fence installation.
Step 1: Attaching Panels
Begin by attaching the vinyl panels to the posts. Follow the manufacturer's instructions to secure the panels using brackets, screws, or other recommended fasteners. Ensure each panel is level and aligned correctly.
Step 2: Adjustments
Make necessary adjustments to ensure the panels fit snugly and the spacing remains consistent throughout the fence. Verify that the top and bottom alignments are uniform for a polished finish.
Step 3: Gate Installation
If the vinyl fence includes a gate, install it according to the manufacturer’s specifications. Check that the hinges and latch mechanisms function correctly and that the gate swings freely without any obstructions.
Step 4: Final Inspection
Inspect the entire fence for stability, alignment, and aesthetic quality. Tighten any loose screws or fasteners and make minor adjustments as needed. Ensure the fence meets safety and design standards.
Step 5: Clean-Up
Gather tools and leftover materials, disposing of waste responsibly. Leave the area clean and clear. Celebrate the completion of the project!
Maintenance Tips
A vinyl fence requires minimal maintenance but benefits from periodic care:
- Cleaning: Wash the fence with water and mild detergent to remove dirt and stains.
- Inspection: Regularly check for loose panels or posts and secure them as needed.
- Repair: Address any cracks or damages promptly to prevent further issues.
Conclusion
A two-day vinyl fence installation is achievable with proper planning, tools, and execution. By laying a solid foundation on the first day and focusing on panel installation on the second day, the result is a durable and visually appealing fence that enhances the property. Appreciate the installation process and take advantage of the benefits offered by your newly installed vinyl fence.
The new fence is private and cleanly installed.
Leave your comment